


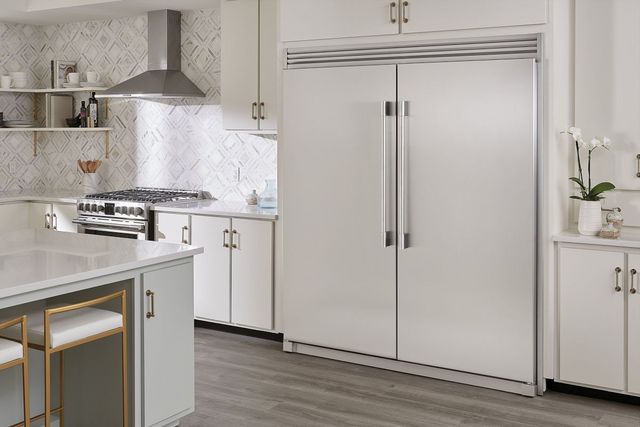
The crate is open in the driveway, the tape measure says the cabinet opening is 47 and three quarter inches wide, and the spec sheet for the 48-inch unit on the pallet calls for 48 and one eighth. Two hours later the delivery crew is gone, the old refrigerator is on the truck, and a cabinet maker is being asked to shave a filler strip that went in three weeks ago. That is how most built in refrigerator projects go sideways, and it is almost never the appliance’s fault. The opening, the outlet, the water line, and the toe kick all get decided long before the truck shows up, usually by someone reading a countertop drawing instead of a manufacturer spec sheet.
Build the Opening Around the Right Refrigerator
Our team matches cutout width, height, and depth to the right built-in model, then handles delivery, professional installation, and local service across central Wisconsin. Shop online or see fit and finish in person at a showroom near you.
Explore built in refrigeratorEvery failure above traces back to a number somebody could have checked weeks earlier, which is exactly why this job is more forgiving than it looks. At Furniture & ApplianceMart, our team delivers and installs these units in kitchens across the Wausau, Stevens Point, Wisconsin Rapids, Marshfield, and Appleton areas, so we know which measurements decide a fit and which mistakes cost real money. This guide walks through refrigerator types and the terminology behind them, how to measure a rough opening correctly, the electrical and water prep that has to happen first, the installation sequence in order, how custom panels and trim kits get fitted and aligned, and the point where the job should be handed to a professional.
Key Takeaways
- The opening is built for the appliance, not the other way around: A built-in needs a verified rough opening roughly 84 inches tall and 24 to 25 inches deep, confirmed against the spec sheet before cabinets, flooring, and countertops go in.
- Front ventilation is the rule that gets broken most: These units breathe through the top or bottom grille, so a paneled-over toe kick or a flooring transition across the grille makes the compressor run hot and can void warranty coverage.
- Utilities come before delivery day: Plan a dedicated 120-volt circuit with an accessible outlet, a quarter-inch braided or copper supply line on a compression shutoff valve, and a slack loop so the unit can be pulled for service.
- Weight changes the whole plan: Built-in cases commonly run 400 to 600 pounds, and 42 and 48-inch models can exceed that, which affects doorway routing, floor protection, and crew size.
What Is a Built In Refrigerator? Types, Terms, and Installation Differences
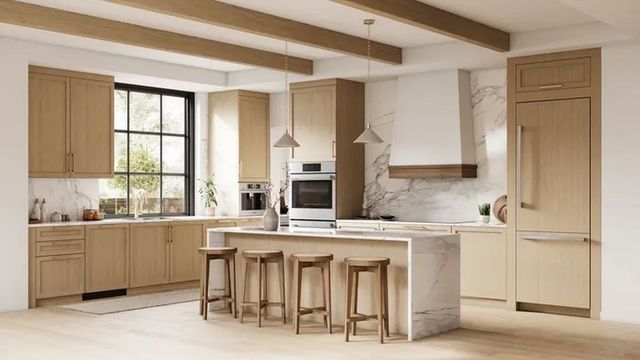
A built in refrigerator is a unit engineered to sit flush inside a finished cabinet opening rather than stand in front of it. Most are close to 84 inches tall and roughly 24 to 25 inches deep, and they vent forward through a grille at the top or the bottom instead of pulling air from behind, which is what allows cabinetry on both sides and above.
That last detail is the whole difference between the categories buyers mix up, and mixing them up is expensive.
Four Terms People Use Interchangeably and Should Not
- Freestanding: a standard 30 to 36-inch unit, roughly 30 to 34 inches deep, that vents at the rear and top and simply stands in an alcove.
- Counter-depth: a shallow freestanding unit, about 24 to 27 inches deep excluding handles, that still vents at the rear and top and still projects past the counter at the doors.
- Built-in: a case designed for a planned opening, front-vented, secured to surrounding cabinets, with the door face landing in line with the cabinet run.
- Fully integrated: a built-in taken one step further, wearing custom panels and matching hardware so it disappears into the cabinetry entirely.
Here is the point competitors skip. A built in refrigerator and a counter-depth model are not interchangeable in the same opening. The ventilation path is different, the required cabinet depth is different, and the securing method is different, so swapping one plan for the other partway through a remodel means reworking the cabinet box.
Finishes and Door Fronts Are Installation Decisions
The front treatment you choose sets your lead times and your alignment work, not just your look:
- Stainless with a factory trim kit: arrives finished, installs fastest, and needs no cabinet shop involvement.
- Overlay panel ready: custom fronts that sit slightly proud of the frame, ordered to the manufacturer’s panel specification.
- Flush inset custom panels: fronts that line up with the faces of adjacent cabinet doors, the most demanding alignment work of the three.
- Professional-style handles: often ordered separately, with placement dictated by the panel drawing rather than by preference.
A panel ready refrigerator needs its panels ordered alongside the cabinetry, from the same shop and the same finish batch. Those lead times are frequently measured in weeks, and a finished kitchen waiting on two doors is a common, avoidable delay.
Widths and Configurations You Will Actually Shop
Standard built-in widths run 30, 36, 42, and 48 inches, with 24-inch and 30-inch columns plus undercounter units filling out the rest of the category. Column refrigeration is its own planning exercise, because it splits fresh food and freezing into separate cases. Two 30-inch columns side by side is a 60-inch cabinet problem, not a 30-inch one, and each case wants its own circuit.
Read more:
- Standard vs Counter-Depth Refrigerators: What’s the Difference?
- French Door Refrigerator Buying Guide: Sizes, Features, & Top Models
Built In vs Counter Depth vs Fully Integrated vs Freestanding Refrigerators
Four categories, four different installations. Read across the row that matches what you are considering, then confirm every number against the spec sheet for the exact model.
| Refrigerator Type | Typical Depth | Standard Widths | Cutout Tolerance | Ventilation Path | Door Front Options | Securing Method | Typical Installed Cost Range |
|---|---|---|---|---|---|---|---|
| Freestanding | 30 to 34 inches | 30, 33, 36 inches | Generous, 1 inch or more | Rear and top | Factory finish only | Anti-tip bracket only | Low, delivery and hookup |
| Counter-Depth | 24 to 30 inches | 30, 33, 36, 42 inches | Moderate, about half inch | Rear and top | Factory finish, some panel ready | Anti-tip bracket, wall or floor | Low to moderate |
| Built-In | 24 to 25 inches | 30, 36, 42, 48 inches | Tight, per spec sheet | Front grille | Stainless trim kit or panels | Screwed to adjacent cabinets | Moderate to high |
| Fully Integrated or Column | 24 inches | 18, 24, 30, 36 inches | Tightest, no field fudging | Front grille | Flush inset custom panels | Cabinet-mounted, panel-aligned | Highest, cabinetry included |
Three takeaways worth carrying into your planning:
- Freestanding and counter-depth are realistic retrofits into an existing alcove. Built-in and fully integrated are not.
- Built-in and column installations assume cabinetry is being built around the appliance, which means the appliance gets specified first.
- Installed cost climbs with alignment precision, not with capacity. Panels and reveals are the expensive part.
How to Measure Your Cabinet Cutout for a Built In Refrigerator

Measure in this order every time: width, then height, then depth. Width sets whether the case physically enters the opening. Height sets whether the top of the case and its grille clear whatever is above. Depth decides whether the door face lands flush with the cabinet run or stands proud of it by half an inch that everyone will notice forever.
The tolerance logic is simple. Opening width equals the unit’s nominal width plus a small manufacturer-specified clearance. Height needs added clearance above the case so the unit can be walked in and leveled. Cabinet depth has to let the door front, including any panel thickness, sit in the same plane as the doors beside it.
Take width and height in three places each, at the top, the middle, and the bottom of the opening, and use the smallest number you get. Then check the floor for level and the back wall for plumb. Older central Wisconsin homes with settled framing are rarely square, and a quarter inch of drift across an 84-inch opening eats every bit of tolerance you had.
The Timing Mistake That Causes Do-Overs
Verify the opening against the spec sheet before cabinets, flooring, and countertop are installed. Not after. Once a finished floor raises the deck by three eighths of an inch and a countertop locks the upper limit in place, your options narrow to cutting things that are already paid for.
Identify obstructions early too, because they hide in plain sight:
- Soffits, bulkheads, and crown molding above the opening.
- Window trim or a tile backsplash return that intrudes into the side of the opening.
- Baseboard and shoe molding at the floor line.
- Flooring transitions and thresholds that change the deck height under the case.
- The door swing radius against an island, a peninsula, or an adjacent wall.
The Measuring Checklist
- Measure opening width at the top, middle, and bottom, then record the smallest figure.
- Measure height from the finished floor to the lowest obstruction, again in three places.
- Measure cabinet depth from the back wall to the front face of adjacent cabinet doors.
- Check the floor for level side to side and front to back across the full opening width.
- Check the back wall for plumb, since a wall leaning in steals depth at the top.
- Confirm the door swing has room to open past 90 degrees so drawers pull out fully.
- Compare all six numbers against the manufacturer spec sheet for your exact model number.
Electrical, Water Line, and Ventilation Prep Before Installation Day
Utilities are the part of this job that cannot be improvised once a 500-pound case is halfway into the opening. Get all three sorted first.
Electrical
Plan on a dedicated 120-volt circuit sized to the manufacturer specification for your model, typically a 15 or 20-amp breaker with nothing else on it. Two details matter as much as the breaker. The outlet has to land where it stays reachable after the unit slides in, often in an adjacent cabinet or a specified zone on the back wall, because an outlet trapped behind the case turns every future service call into a two-person job. And current local code may call for GFCI or AFCI protection depending on the room and the year. Confirm both the circuit and the protection requirement with a licensed electrician and the model spec sheet rather than assuming what worked on the last remodel still applies.
Water Supply
If your unit makes ice or dispenses water, run a quarter-inch supply line in braided stainless or copper. Use a proper compression-fitting shutoff valve, never a saddle valve, which pierces the pipe and is a slow leak waiting for a quiet weekend. Confirm household water pressure meets the model’s stated minimum, and leave a generous slack loop coiled in the cabinet so the unit can be pulled forward for service without disconnecting anything.
Front Ventilation
Built-in units reject heat forward through the grille. That means the toe kick and grille area must stay open permanently. No solid decorative panel across it, no flooring transition strip crossing it, no trim piece tucked in for a cleaner line. Restrict that airflow and the compressor runs hot, cycles longer, uses more electricity, and gives up years of service life, and blocked ventilation is a documented reason warranty claims get denied.
The Wisconsin Detail Other Guides Skip
Cold-weather delivery matters here. A unit that rode in an unheated truck at 10 degrees needs time to come up to room temperature before it is plugged in and started, so schedule the acclimation window rather than powering it up the moment it lands. Placement matters too. An unheated garage, a three-season porch, or a cold basement can push a built-in outside its rated ambient operating range, and refrigeration that runs outside that range does not hold temperature reliably.
Pre-Delivery Readiness List
- Dedicated circuit installed, tested, and labeled at the panel.
- Outlet located where it stays accessible after installation.
- Compression shutoff valve installed with the supply line and slack loop in place.
- Finished floor protected with hardboard or heavy runners along the route.
- Doorway, hallway, and turn clearances measured, including whether doors come off.
- Rough opening width, height, and depth confirmed against the spec sheet.
Step by Step: Installing a Built In Refrigerator
With the opening verified and the utilities in place, the install itself follows a fixed order. Skipping ahead is what creates rework.
- Uncrate the unit near the entry point and remove every shipping bracket, block, and interior packing piece before it moves.
- Protect the finished floor along the full route with hardboard or heavy runners, especially at thresholds and turns.
- Move the unit with an appliance dolly and at least two people, keeping it upright and taking turns slowly.
- Remove doors, handles, or the grille if the passage is tight, following the manufacturer’s sequence rather than improvising.
- Walk the case into the opening, checking side clearances as it goes rather than after it is seated.
- Level the unit with the front feet, side to side first, then front to back.
- Secure the case to the adjacent cabinets or the wall using the supplied brackets and hardware.
- Connect the water line to the shutoff valve, open the valve, and check the fitting for weeping.
- Restore power, set the temperatures, and reinstall the grille and any trim.
- Verify cooling over the next several hours and confirm the ice maker is producing.
- Adjust the hinges for door alignment and even reveals as the final tuning step.
Weight Is a Safety Factor, Not a Detail
Built-in cases commonly run 400 to 600 pounds empty, and 42 and 48-inch models can push past that. That number decides your doorway routing, whether the subfloor needs protection or blocking, and how many people are on the job. It is also why door removal is a normal part of the process rather than a sign something went wrong.
Level First, Then Secure
Leveling before securing is not a preference. A level case closes its own doors, seals its gaskets evenly, and lines its front up with the cabinetry. A case that gets screwed to the cabinets first and leveled second fights you on all three. Here is the one detail our installation crews never skip: after setting the unit level side to side, they raise the two front feet roughly a quarter inch above the rear so the case carries a slight rearward tilt, which is what makes the doors swing closed under their own weight instead of drifting open.
Anti-tip and cabinet-securing hardware is non-negotiable on every unit, including panel ready models where the brackets end up hidden. Hinge and door alignment comes last, once the case is level, secured, and loaded with its panels.
What to Expect at Startup
Allow several hours, often overnight, for the interior to reach target temperature before judging performance. Discard the first two or three batches of ice, which carry manufacturing residue and flush the line. Then check the water connection again after the first full day of use, since a fitting that looked dry on install day is the most common source of a slow drip.
Installing Custom Panels, Trim Kits, and Aligning the Doors
The difference between an installation that reads as custom and one that reads as a retrofit is measured in fractions of an inch across three gaps. This is where the money you spent on a built-in either shows or does not.
Three Front Treatments, Three Different Jobs
- Factory trim kit: for stainless models, a set of filler and trim pieces that closes the gap between case and cabinet. Fastest and most forgiving.
- Overlay panels: custom fronts that sit proud of the frame, hiding the case while still reading as an appliance.
- Flush inset panels: fronts aligned with the faces of adjacent cabinet doors, requiring the tightest cabinet tolerances and the most hinge adjustment.
Panel Specifics That Have to Be Right
Every manufacturer publishes a maximum panel thickness and a maximum panel weight, and exceeding either overloads the hinge and shortens its life. Handle placement follows the panel drawing, not preference, because handle hardware can interfere with the hinge travel. Grain direction should run the same way as the adjacent cabinet doors, and panels should come from the same cabinet shop and the same finish batch as the run they sit in, since stain lots drift and a refrigerator panel that is one shade off is the first thing anyone notices.
Reveals and Hinge Adjustment
Most built-in hinges adjust on multiple axes, letting you move a door up and down, side to side, and in and out. Set the gaps at the top, the bottom, and between the doors so they read consistently across the whole front. A reveal that measures an eighth of an inch at the top and three sixteenths at the bottom looks crooked even to someone who could not name what is wrong.
Close the Coordination Gap
Panels, cabinetry, and the appliance run on three separate lead times, and they rarely line up on their own. The appliance spec sheet needs to be in the cabinet maker’s hands before shop drawings are approved, not after the boxes are hung. That single step prevents most panel rework.
One thing panels must never do is cover the ventilation opening. Even in a fully integrated look, the grille and toe kick stay functional. Decorative material that crosses the airflow path defeats the cooling system no matter how good it looks.
Built In Refrigerator Pros and Cons Every Homeowner Should Weigh
A built-in buys you a kitchen where the refrigerator stops interrupting the cabinet run, plus interior engineering that most freestanding units do not offer. What it costs you is flexibility and money, both up front and at installation. Both halves are real, and which one matters more depends on whether you are remodeling or replacing.
Pros
Integrated cabinetry look
The case sits flush in a planned opening and can wear custom fronts, so the appliance reads as part of the kitchen rather than an object parked in it.
More usable space in a shallower box
Built-ins recover capacity through height and width instead of depth, which is how a 24-inch-deep case still delivers competitive cubic feet.
Premium interiors and tighter temperature control
Separate cooling circuits, dual evaporators, and precise drawer climates hold produce and proteins better than a single-evaporator design.
Longer expected service life
Heavier compressors, front-vented sealed systems, and serviceable components mean these units are built for a longer run than mainstream models.
Resale appeal in a remodeled kitchen
A flush, panel-matched refrigerator signals a finished custom kitchen to buyers and appraisers.
Cons
Higher purchase and installation cost
The appliance costs more, and the cabinetry work, panels, dedicated circuit, and water line all add to the installed total.
Very little flexibility later
A fixed cabinet opening, a front-vent path, and a specified outlet location mean your future replacement has to fit the same envelope or the cabinets get modified.
Read more:
DIY vs Professional Installation, Costs, and Mistakes to Avoid
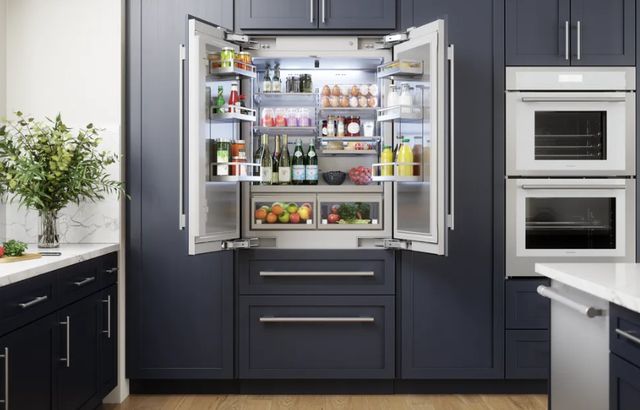
Some of this job is genuinely approachable, and some of it should not be attempted by a homeowner with a dolly and an optimistic afternoon. Splitting it honestly saves both money and regret.
What a Capable DIYer Can Handle
- Measuring and verifying the rough opening in all three dimensions.
- Prepping the opening, clearing trim and molding, and protecting the floor.
- Removing packing material and shipping brackets.
- Reinstalling the grille and toe kick after the case is set.
- Setting temperatures and monitoring the first cooling cycle.
What Should Be Hired Out
- Moving a 400 to 600 pound case through a doorway and onto a finished floor.
- Adding or relocating a dedicated circuit and outlet.
- Running a new water line and installing a compression shutoff valve.
- Aligning flush inset panels and dialing in reveals.
- Any cabinetry modification to the opening itself.
Real Cost Context
Use ranges, not single figures, because every kitchen is different. Professional delivery, placement, and hookup typically lands in the low to mid hundreds. Adding a dedicated circuit or relocating an outlet is usually a few hundred dollars of electrician time, and running a new water line to a kitchen that never had one is similar. Haul-away of the old appliance is often bundled or modest. Cabinetry modification is the largest variable by far and can dwarf everything else on the list, which is exactly why measuring before the boxes go in pays for itself.
The Mistakes With the Worst Consequences
- Blocking the toe kick or grille with a panel, trim, or flooring transition.
- Using a saddle valve on the water supply instead of a compression shutoff.
- Exceeding the manufacturer’s panel thickness or weight limit.
- Leaving the outlet behind the unit where it cannot be reached.
- Measuring the opening after cabinets, flooring, and countertop are installed.
- Omitting the slack loop, so the unit cannot be pulled for service.
- Skipping the anti-tip and cabinet-securing hardware.
Post-Install Symptoms and What They Usually Mean
- Doors not sealing: the case is not level, or a panel exceeds the weight limit and is pulling the hinge.
- Unit running warm: front ventilation is restricted, or the ambient temperature at the location is outside the rated range.
- No ice after 24 hours: the shutoff valve is closed, the line is kinked, or the ice maker was never switched on.
- Uneven reveals: hinge adjustment was skipped, or the opening is out of square and the panels were set to the cabinet instead of to plumb.
Professional installation from Furniture & ApplianceMart covers the parts that go wrong most. Our team helps you confirm site measurements against the spec sheet before you order, our delivery crews handle the route, the placement, the leveling, and the hookup, and our in-house service department is here in central Wisconsin if something needs adjusting six months later. That combination of appliance delivery and installation plus local after-the-sale service is the practical reason to buy a built-in from an independent retailer instead of a big-box order and a call center.
The Tolerance Budget That Decides Whether Your Built In Refrigerator Fits
Think of your rough opening as having a fixed amount of slop to spend, often around half an inch total across the width and a similar amount in height. Every condition in the room draws from that same account, and the reason installs fail is not one big error but four small withdrawals that add up past the balance. A framer’s quarter inch of out-of-square, an eighth inch of finished flooring under the case, a sixteenth of extra panel thickness, and a baseboard return nobody removed will together overspend a half-inch budget before the appliance ever arrives. Writing the withdrawals down turns a vague worry into arithmetic you can check.
- Manufacturer clearance: the specified gap on each side and above the case, typically the largest single line item and the only one you cannot negotiate.
- Framing and drywall variance: measure top, middle, and bottom, then budget the difference between the largest and smallest reading as spent.
- Floor deck height: any tile, hardwood, or underlayment added under the opening reduces available height, so subtract the finished thickness.
- Panel and handle projection: overlay and flush inset panels add thickness in front, and handles add more, which affects how the front plane lines up.
- Hinge side wall proximity: leave enough room for the door to open past 90 degrees, or drawers will never fully clear the opening.
- Grille and toe kick access: reserve that space as untouchable, because it is airflow, not tolerance.
Read more:
- Best Sub-Zero Refrigerator Models for Luxury Kitchens
- Why Furniture & ApplianceMart Stands Out Among Furniture Stores in Milwaukee
Built In Refrigerators Available at Furniture & ApplianceMart
Every model below is described by what its installation actually demands, from cutout width to panel treatment to where the water line has to land. Our showrooms across central Wisconsin let you open the doors, see the finishes side by side, and check fit and reveal in person before you commit cabinetry to a plan. Delivery, professional installation, and local service are all available from our own crews.
Frigidaire Professional 33” 18.9 Cu. Ft. Stainless Steel Built-In Column Refrigerator
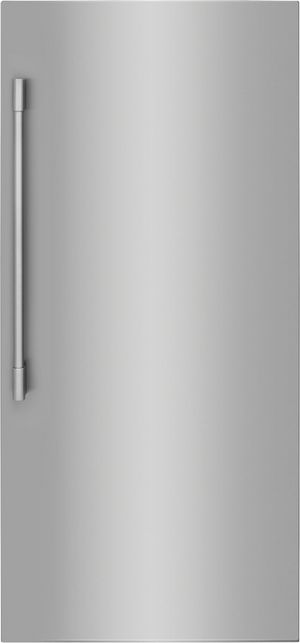
Column refrigeration is the answer when the freezer belongs somewhere other than under the fresh food. This 33-inch all-refrigerator column carries 18.9 cubic feet in a case built to sit flush with cabinetry, and its factory stainless front means no panels to order and no cabinet shop lead time. Because it is refrigeration only, plan the cutout as a pair with a matching freezer column, each case getting its own dedicated circuit and its own water line where ice is involved. As covered earlier, columns change the cabinet math entirely.
Top Features
- 33-inch column width: Sets a wider fresh food cutout than a 24-inch column while still leaving room for a freezer beside it.
- 18.9 cubic feet of refrigeration only: All the interior volume goes to fresh food, so the freezer becomes a separate planned case.
- Factory stainless front: Skips the panel ordering step and the cabinet shop lead time entirely.
- Front-vented built-in case: Breathes through the grille, so the toe kick area stays clear in the finished cabinetry.
Bosch Benchmark Series 30” 16.5 Cu. Ft. Panel Ready Built-In Bottom Freezer Refrigerator
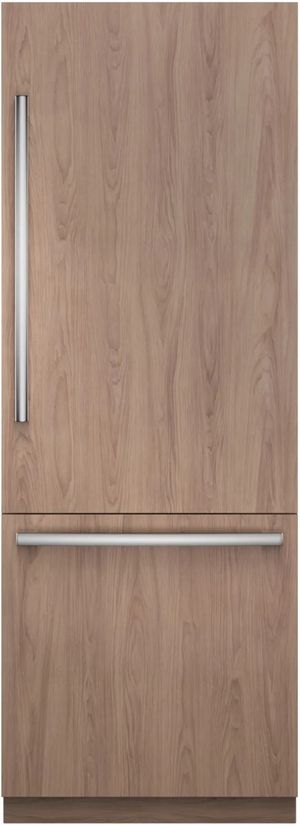
Panel ready is how a refrigerator stops looking like one. This 30-inch Benchmark bottom freezer accepts custom fronts from your own cabinet shop, so the doors match the run beside them in grain, stain, and reveal. At 16.5 cubic feet it fills a standard 30-inch opening without the width a 36-inch box demands, which frees cabinet space in a galley or a narrow remodel. Order the panels with the cabinetry and hand the spec sheet to the shop before drawings are approved, so thickness and weight limits get respected the first time.
Top Features
- 30-inch built-in cutout: Fits a planned 30-inch opening where a wider case would force cabinet rework.
- Panel ready fronts: Takes custom doors so the refrigerator disappears into a fully integrated cabinetry design.
- Bottom freezer layout: Puts fresh food at eye level with the freezer in a pull-out drawer below.
- 16.5 cubic feet in a 24-inch-deep case: Recovers capacity through height rather than depth, keeping the front plane flush.
Bosch Benchmark Series 30” 16.5 Cu. Ft. Stainless Steel Built-In Bottom Freezer Refrigerator with SoftClose Flat Hinge
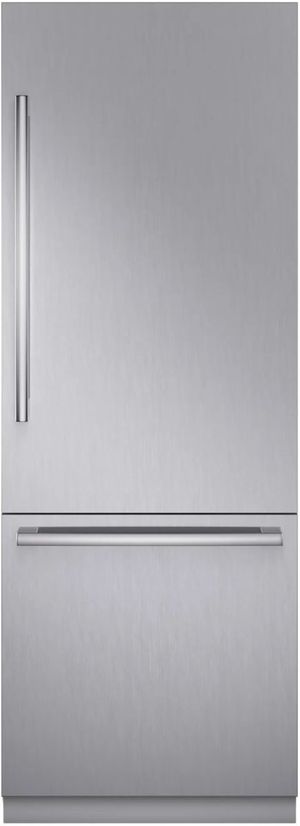
Same 30-inch footprint, a very different installation. This one arrives with a finished stainless front, so nothing waits on a cabinet shop, and the SoftClose flat hinge lets the door sit closer to the adjacent cabinet faces than a conventional hinge allows. That buys a tighter, more even reveal in a stainless kitchen where the refrigerator is meant to read as an appliance rather than vanish. Verify the rough opening in three places anyway, and keep the front grille clear, because a finished-front built-in still breathes through the toe kick.
Top Features
- SoftClose flat hinge: Allows a tighter cabinet reveal and closes the door softly instead of letting it swing shut.
- Finished stainless front: No panel order, no finish batch matching, and no waiting on shop drawings.
- 30-inch built-in width: Drops into the same planned opening as the panel ready version of this model.
- Front grille ventilation: Heat leaves through the toe kick area, which has to stay unobstructed after flooring goes in.
Thermador Freedom 36” 20.1 Cu. Ft. Panel Ready Built-In French Door Refrigerator
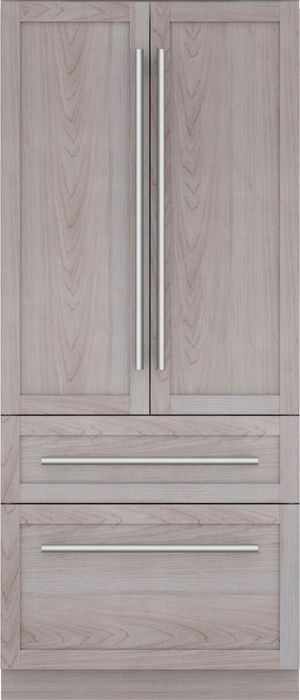
A 36-inch opening is the most common built-in cutout in a kitchen remodel, and this Freedom French door fills it with 20.1 cubic feet behind panel ready fronts. Two narrow upper doors swing a smaller arc than one wide door, which matters when an island sits three feet away. Panel ready means custom fronts, handle placement, and grain direction all get coordinated with the cabinet maker, so confirm maximum panel thickness and weight early. The dedicated circuit, accessible outlet, and water line still need to be set before the case moves in.
Top Features
- 36-inch planned cutout: The mainstream built-in width, and the one most cabinet layouts are drawn around.
- Panel ready French doors: Custom fronts on both upper doors for a flush inset look that matches the cabinet run.
- Smaller door swing arc: Two narrow doors need less clearance to an island than a single wide door.
- 20.1 cubic feet of capacity: Full family capacity inside a 24-inch-deep built-in envelope.
Monogram 48” 28.6 Cu. Ft. Stainless Steel Built-In Side-by-Side Refrigerator
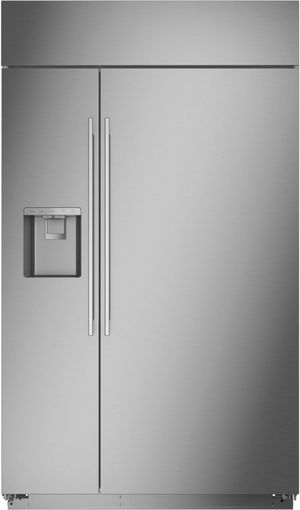
Forty-eight inches is the widest built-in most homes will ever take, and it turns the conversation from appliance into structure. With 28.6 cubic feet behind a stainless side-by-side front, this Monogram needs a rough opening verified to the eighth of an inch, cabinetry engineered to carry the loads beside it, and a floor that will not deflect under the weight. Side-by-side doors need less swing room than any other style, which helps in a busy aisle. Measure the doorway and hallway route before ordering.
Top Features
- 48-inch rough opening: The widest common built-in cutout, so the cabinet run has to be designed around it from the start.
- 28.6 cubic feet of capacity: Open-concept kitchen capacity without going deeper than a 24-inch built-in envelope.
- Side-by-side doors: Tall narrow doors need the least swing clearance of any configuration.
- Ice and water in the door: Requires a quarter-inch supply line on a compression shutoff with a slack loop for service.
Bosch 800 Series 22” 8.3 Cu. Ft. Panel Ready Built-In Bottom Freezer Refrigerator
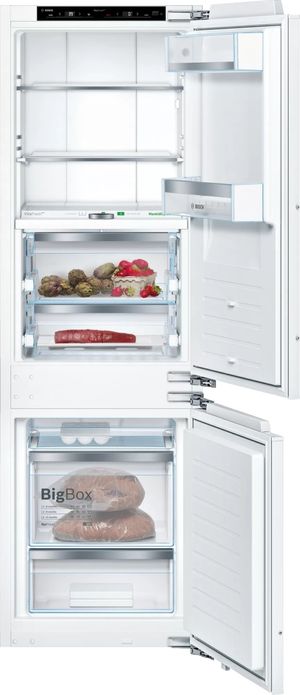
At 22 inches wide and 8.3 cubic feet, this is not a primary refrigerator and should not be planned as one. It is the column that turns a pantry, a butler’s pantry, or a beverage zone into real storage, sitting flush behind a panel that matches the surrounding doors. The narrow case fits openings a full-size built-in cannot use, though it still wants its own dedicated circuit and its own unobstructed front ventilation path. Pair it with a larger unit in the main cabinet run rather than asking it to carry the kitchen.
Top Features
- 22-inch narrow column: Fits pantry and beverage-zone openings that a 30 or 36-inch built-in cannot enter.
- Panel ready front: Wears a cabinet panel so the column blends into a butler’s pantry or secondary run.
- 8.3 cubic feet with a freezer drawer: Secondary storage with both fresh food and frozen space in one narrow case.
- Own circuit and own airflow: Treat it as a full appliance for utility planning, not as a cabinet accessory.
Your Built In Refrigerator Installation, Done Right From Measurement to Cooling
Accurate cutout measurements, a dedicated circuit with an accessible outlet, a proper water line with a slack loop, protected front ventilation, and careful leveling before securing are what separate a clean installation from an expensive redo. Panels and reveals are the last step, not the first, and they only look right when the case underneath them is level and square in the opening.
Bring your measurements to Furniture & ApplianceMart. Shop built in refrigerators online or visit a showroom in the Wausau, Stevens Point, Wisconsin Rapids, Marshfield, or Appleton area to see finishes, hinge action, and reveals in person before your cabinet drawings get approved. Our appliance specialists help verify your opening against the spec sheet, our own delivery and installation crews handle the heavy lifting, the leveling, and the hookup, and our in-house service team is right here in central Wisconsin long after the sale. That is what an independent Wisconsin retailer gives you instead of a warehouse and a phone tree.
Frequently Asked Questions about Built In Refrigerators
A built in refrigerator generally needs a rough opening equal to its nominal width plus a small specified clearance, a height near 84 inches, and a cabinet depth of about 24 to 25 inches so the door face lands flush. Exact figures vary by model, so the spec sheet for your specific model number is the only source cabinetry should be built from.
Yes, a built in refrigerator should run on its own dedicated 120-volt circuit sized to the manufacturer specification, with the outlet placed where it stays reachable after the unit is in place. A licensed electrician should confirm the breaker size and any local GFCI or AFCI requirement before installation day.
A built in refrigerator vents through the front grille, so the toe kick and grille opening must stay completely clear while the side and top gaps follow the spec sheet, often a small fraction of an inch. Blocking that front airflow with flooring, trim, or a decorative panel makes the compressor run hot and can void warranty coverage.
A capable homeowner can verify measurements, prep the opening, protect the floor, and reinstall the grille, but moving a 400 to 600 pound case, adding a circuit, plumbing a water line, and aligning flush inset panels belong with professionals. Warranty coverage also depends on correct securing and clearance, which an experienced crew handles as part of the installation.
Professional installation of a built in refrigerator commonly runs in the low to mid hundreds for delivery, placement, and hookup, with a new dedicated circuit or water line adding a few hundred more. Cabinetry modification is the largest variable and can move the total well past the appliance labor itself.
A built in refrigerator is engineered to sit flush inside a planned cabinet opening and vents through the front grille, while a counter depth refrigerator is a shallow freestanding unit that still vents at the rear and top. They are not interchangeable in the same opening because the required depth, the ventilation path, and the securing method are all different.
Why Trust Furniture & ApplianceMart?
For over 55 years, Furniture & ApplianceMart has proudly served Wisconsin and Illinois as a local, employee-owned retailer built on family values and long-term relationships. What began as a customer-first business has grown into the area’s only true one-stop shop for furniture, appliances, and mattresses.
Our mission is to improve the quality of people’s lives by making amazing rooms together. We offer trusted national brands, competitive pricing, and flexible financing options for every budget to make furnishing your home simple and stress-free. We service what we sell with repairs completed by skilled, in-house technicians you can rely on. With a meet or beat price guarantee and a commitment to exceptional service after the sale, we stand behind every purchase.
Shop at Furniture & ApplianceMart
At Furniture & ApplianceMart, you’ll find a wide selection of furniture at competitive prices. From custom furniture to top-brand mattresses and major appliances, we make it easy to shop for everything you need in one store. Ask about clearance and scratch-and-dent savings available at every location, professional delivery and installation, design consultations, appliance repair services, and convenient financing options. Visit one of our showrooms across Wisconsin and Illinois or shop online today.